Clients
The Clients section is your roster — every active client, every outstanding invitation, and the per-client workspace where you adjust their plan and review progress.
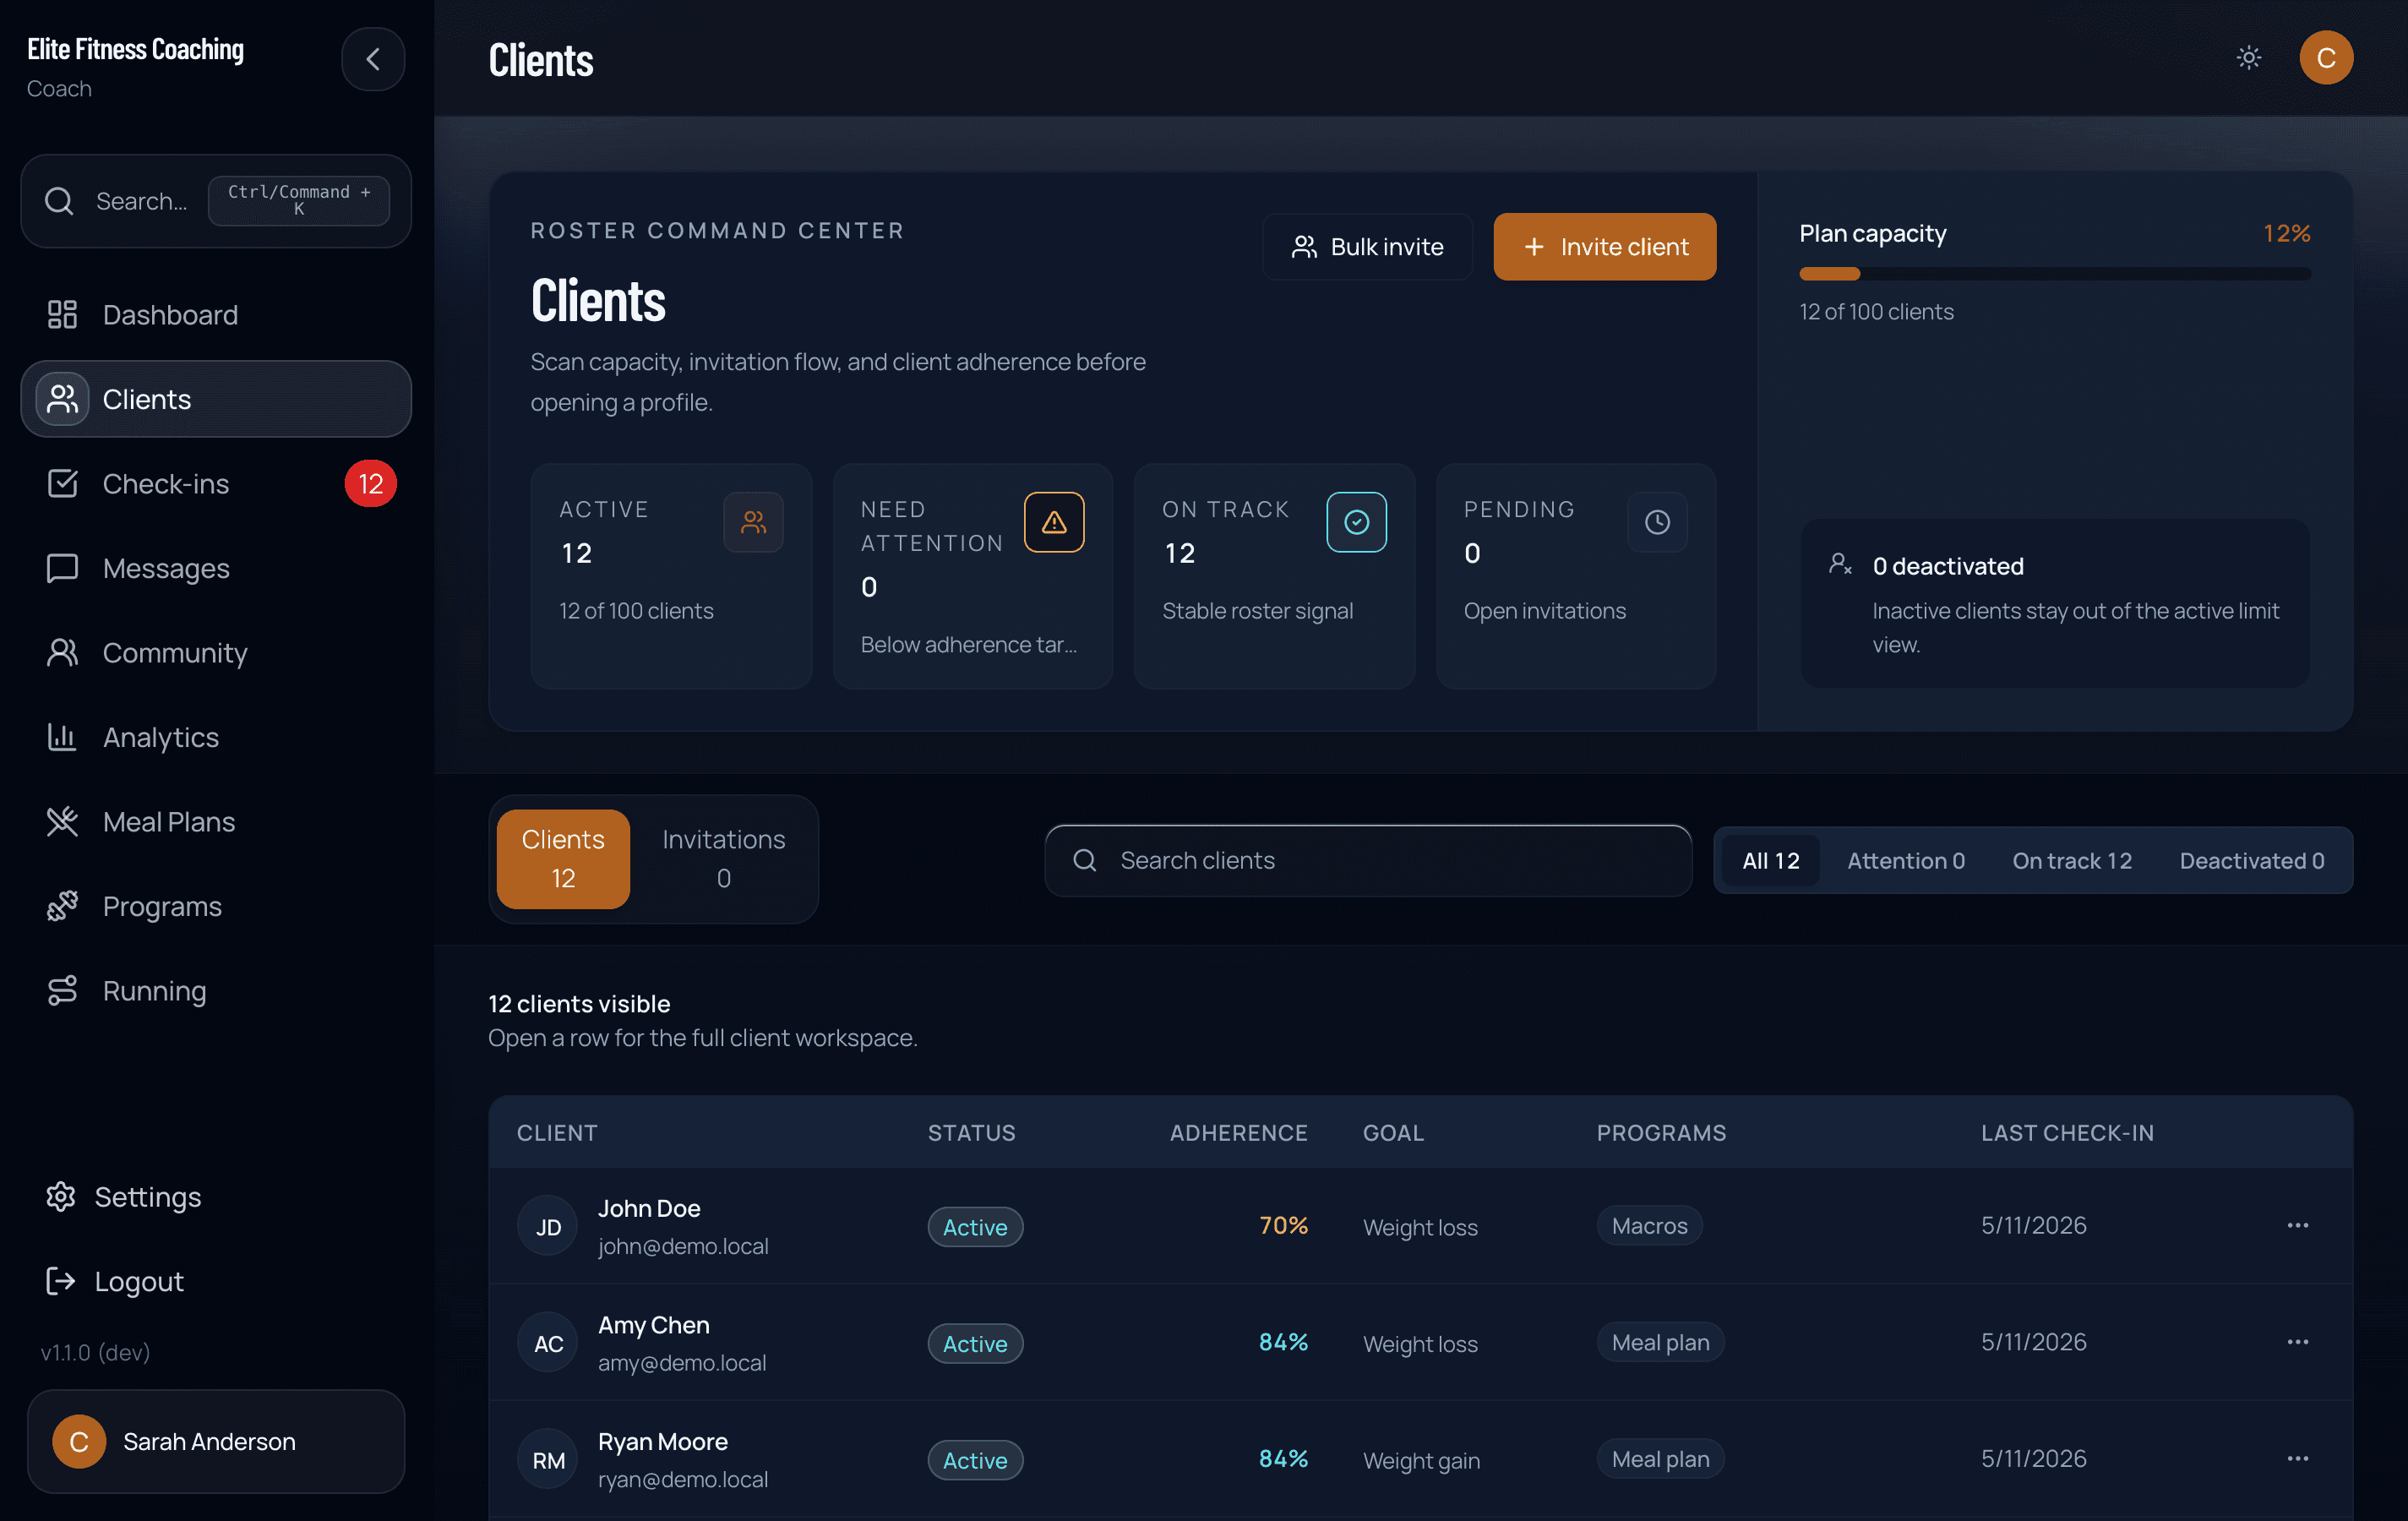
The roster
Coach → Clients opens the roster with two tabs:
- Clients — accepted clients
- Invitations — invites you’ve sent that haven’t been accepted yet
Above the tabs, you’ll see roster stats: total active clients, how many need attention, how many are on track, deactivated count, pending invitations, and your client limit. The limit comes from your plan tier (free starts at 5, paid tiers go up).
Client status buckets
Each client falls into one of three buckets, derived from their account status and recent compliance:
- Attention — client is missing logs, has fallen behind on macros, or is otherwise off-track. These show up first.
- On track — client is logging consistently and hitting their plan.
- Deactivated — account is disabled (you can deactivate without deleting).
The roster has a status filter you can use to focus on one bucket at a time. Combined with the search box, you can quickly find “all clients needing attention named Sarah.”
Inviting clients
Two ways:
- Invite (single) — opens a one-off invite form. You enter the client’s email, they get a magic link to sign up.
- Bulk invite — paste or upload multiple emails at once. After it succeeds, the roster automatically switches to the Invitations tab so you can confirm they all sent.
Pending invitations stay in the Invitations tab until the client accepts or you delete the invite. Stale invites can be removed from the row’s action menu.
Opening a client
Click any row in the Clients tab to open that client’s workspace. The detail view has seven tabs:
| Tab | What’s there |
|---|---|
| Overview | Compliance %, current weight, weight change, progress vs. goal, recent logs, recent check-ins, quick “Adjust” buttons for macros/cardio/steps, and physical readiness (PAR-Q) screening |
| Logs | The full activity log — meals, workouts, weigh-ins. Use Add Progress Entry here to record a client’s weight, body fat, and body measurements on their behalf |
| Movement | Functional movement screens you record for the client (overhead squat, single-leg stance, pushing, plank), plus re-screens over time |
| Notes | Coach notes timeline. Add and remove notes here. |
| Nutrition | Nutrition-specific insights derived from recent logs |
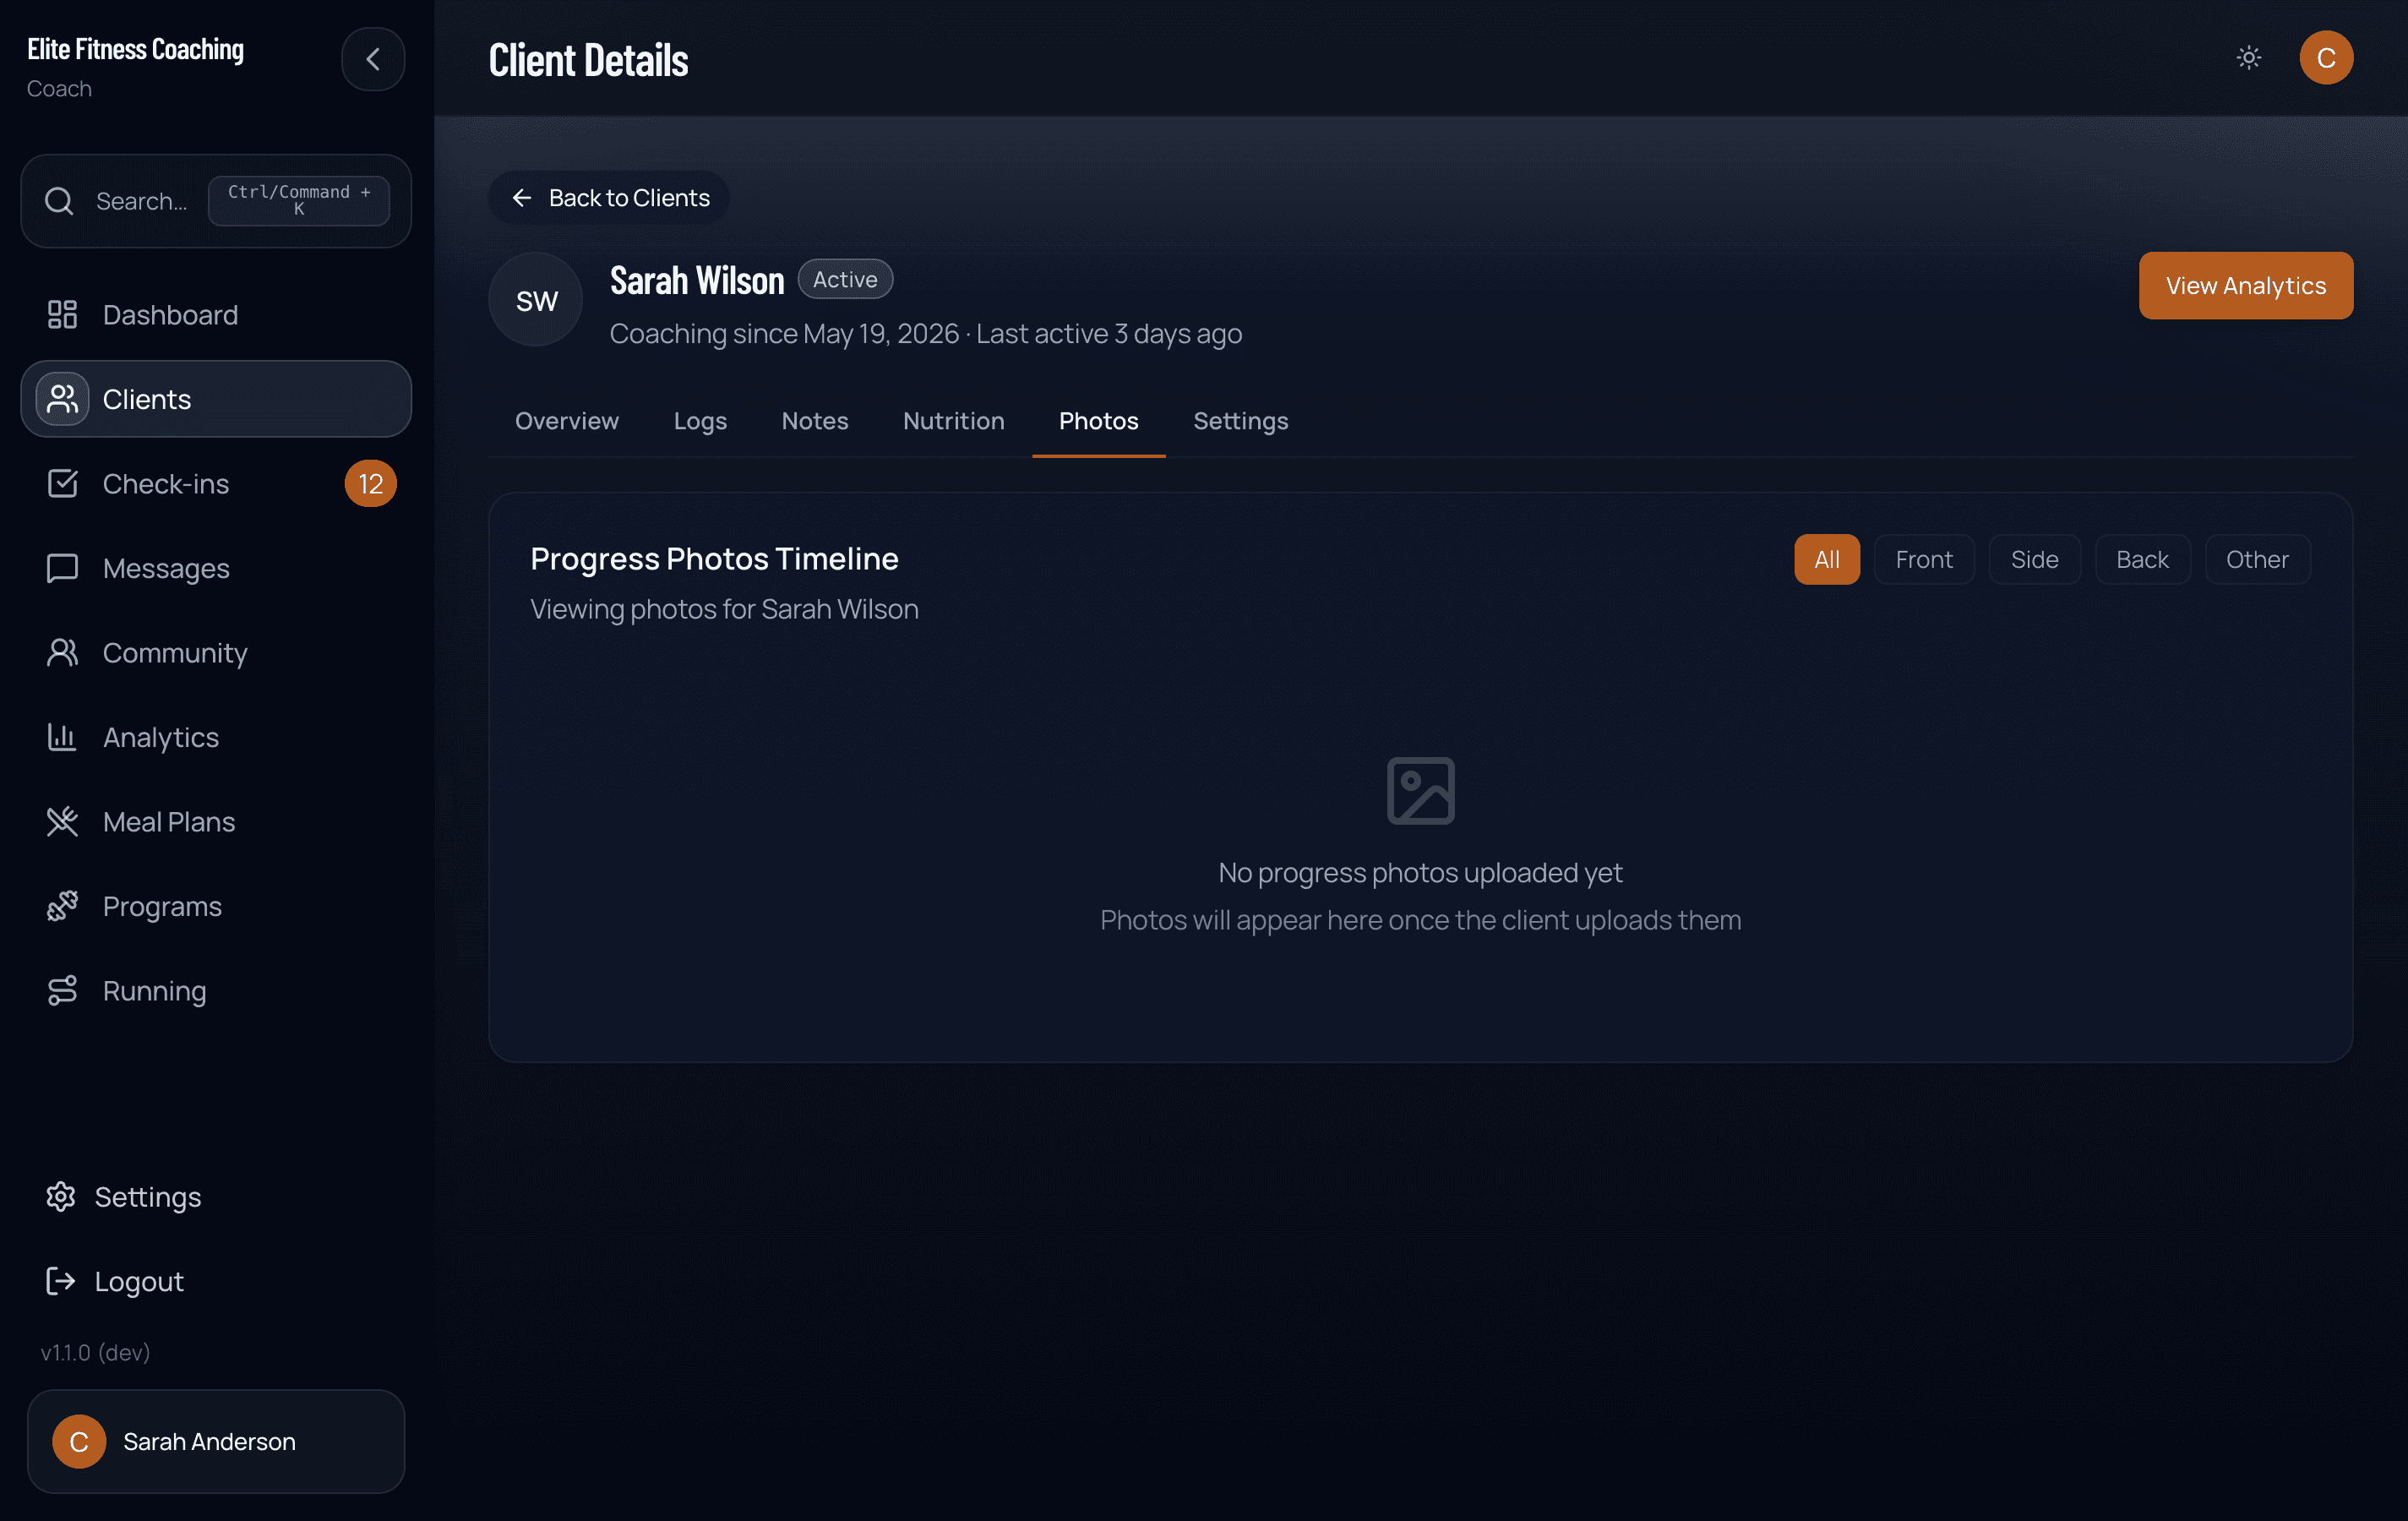
| Photos | Progress photo timeline for this client — front / side / back uploads, organized by date. |
| Settings | Per-client settings: nutrition tracking type, check-in day, whether the exercises module is enabled |
Workout logs and client notes
Workout logs on the Logs tab carry per-exercise client notes when the client jots them down mid-session (form cues, “felt heavy”, “next week try +5lb”). These notes appear inline with the logged sets so you can see context alongside the actual numbers. They’re attached to the log, not the program — so the program template you assigned is unchanged, but each session preserves what the client wrote.
A client’s notes for an exercise carry over to next week’s workout pre-filled in their textarea — they can edit, keep, or clear. Cleared notes stay cleared and won’t re-seed.
Adding progress entries for a client
Some clients won’t log their own measurements — they get weighed and measured in person, or they simply prefer you to track it. The Add Progress Entry button on the Logs tab lets you record a weight, body fat %, and body measurements (chest, waist, hips, arms, thighs) against any date for that client. Enter at least one value and save; the entry shows up in their logs and updates their current weight just as a self-logged entry would. Values use the client’s own units, so what you type is stored exactly as the client sees it.
Photos tab
The Photos tab shows every progress photo the client has uploaded (via the dashboard, check-in submission, or the mobile camera flow). Filter by tag (front / side / back / other), date range, or click any photo to open it full-size with weight + date overlays. This was previously on the Analytics deep-dive page; it now lives here so it’s grouped with the rest of the per-client surfaces.
Movement screens
The Movement tab is where you record a client’s functional movement screen, the hands-on assessment a coach performs rather than something the client self-reports. Tap New screen to work through the four movements:
- Overhead squat — feet, knees, forward lean, arms
- Single-leg stance — right and left balance and knee control
- Pushing (wall / modified push-up) — scapular control, hip sag, head position
- Plank — hip position, shaking, and hold time in seconds
For each movement you tap the faults you observe (selecting none means the movement was clean), add an optional hold time for the plank, and jot per-movement comments. An overall notes field captures the corrective focus for the next block.
Each save is a dated record. The first one is the baseline; later ones are re-screens, and the tab shows a baseline to latest comparison that calls out which faults the client resolved, which are new, and which are still present. Edit or delete any record from its card.
New to this tab? Tap Take a tour in the Movement header for a short guided walkthrough.
Clients see their own movement screens (read-only) under Insights → Movement so they can follow their own progress without being able to change the results.
Compliance
The compliance number on the Overview tab is calculated from the client’s recent logs over a rolling 30-day window. It combines nutrition adherence with weight, steps, and cardio logging.
For new clients, the window shrinks automatically — a client who joined three days ago is scored over those three days, not penalized as if they missed 27. The system uses the longer of “days since joining” or the full 30 once they’re past the first month.
For macro-based nutrition, the nutrition portion scores recent macro logs against the client’s active targets. For meal-plan nutrition, meal completions drive the nutrition portion instead. If a client has no recent logs at all, their compliance reads 0% and they bucket as “needs attention.”
Adjustments
The Overview tab has three adjustment buttons that open small modals:
- Adjust macros — change the client’s daily macro assignments (separate from their meal plan; this is the active target the dashboard scores compliance against)
- Adjust cardio — change cardio assignments
- Adjust steps — change daily step target
These adjustments are per-client and don’t touch the meal plan template. If you want to overhaul the plan itself, edit it from Meal Plans instead.
Weight progress
Weight progress on the Overview is computed from three values on the client’s profile:
- Starting weight — what they were when they joined
- Current weight — most recent weigh-in
- Target weight — their goal
The system computes progress percentage based on the goal direction (loss vs. gain) — moving toward target counts as positive progress regardless of which direction “up” is.
Correcting weights and units
All three values can be edited from the Client Information card in the Overview sidebar — click the pencil icon to open the editor. This is handy when a client made a mistake during signup (for example, entering their weight in kilograms when the form was set to pounds). Leave a field blank to keep its current value.
The editor also has a lbs / kg toggle that sets the client’s unit preference (it only affects that client — your workspace setting is untouched). Flipping it converts the weights shown in the editor automatically, and the client’s height is converted behind the scenes, so all of their measurements stay accurate. After saving, the client sees their portal in the new units.
Past weigh-ins in their history (daily logs and check-ins) are not converted — only the profile values. If the client’s macros were calculated from the old values, recalculate them after correcting so their targets and meal plans stay accurate.
Physical readiness (PAR-Q)
To ensure client safety and minimize injury risk, the platform includes a standard Physical Activity Readiness Questionnaire (PAR-Q) screening during client onboarding.
Client completion
When clients accept their onboarding invite, they are prompted to complete the 7-question PAR-Q screening.
- If a client has not completed this screening yet, the Overview tab sidebar will display a notice: “This client has not completed the Physical Activity Readiness Questionnaire (PAR-Q) yet. They will be prompted to fill this out when they accept their onboarding invitation.”
- If a client completes the questionnaire and answers No to all questions, the screening section in the sidebar remains collapsed, showing a green checkmark indicating they are cleared for exercise.
Coach review and medical clearance
If a client answers Yes to one or more PAR-Q questions:
- Alert Banner: A high-visibility warning banner is shown at the very top of the client’s workspace:
[!WARNING] Medical Clearance Required: This client flagged one or more items on their physical readiness screening (PAR-Q). Please review their details and secure medical clearance if necessary before commencing intense training.
- Collapsible Sidebar Screening: In the right sidebar under the client information stack, the Physical Readiness (PAR-Q) Screening section is displayed.
- Auto-Expansion: If a client has flagged “Yes” responses, this sidebar panel auto-expands automatically so it immediately catches your attention.
- Clarity-First Filter: To save your time and eliminate noise, the screening interface filters out all “No” answers. It displays only the questions where the client answered Yes, highlighted in red with an alert icon, so you can instantly identify precise health constraints or risk factors.
Updating the PAR-Q
The PAR-Q isn’t frozen at onboarding. Tap Edit on the Physical Readiness panel to update a client’s answers yourself, useful when their health changes, or to record a screening for a client who joined before it existed. Saving recomputes the clearance flag and timestamps the revision; the original completion date is preserved. Clients can also update their own answers from their settings.
Per-client settings
The Settings tab on a client has switches for what the client sees and how their tracking behaves:
- Nutrition type — how their nutrition is tracked (full macros, calories only, etc.)
- Check-in day — which day of the week their weekly check-in is due
- Exercises module — whether exercise programs are visible to this client
Toggling a module off hides it from that client’s portal — useful if you don’t program for that area for them.
Deleting vs. deactivating
The roster lets you delete a client, but the confirmation dialog makes the trade-off explicit:
Deleting permanently removes all of their data, including check-ins, meal logs, and progress history. If you would like to retain their data but disallow access, consider deactivating their account instead.
Deactivation revokes access while preserving the data — they reappear in the Deactivated bucket and can be reactivated later. Use delete only when you’re sure; there’s no undo.